Before and after photos are powerful tools for any home renovation company’s marketing. They showcase your expertise and attract potential clients. But capturing those transformative shots requires more than just snapping a few pictures.
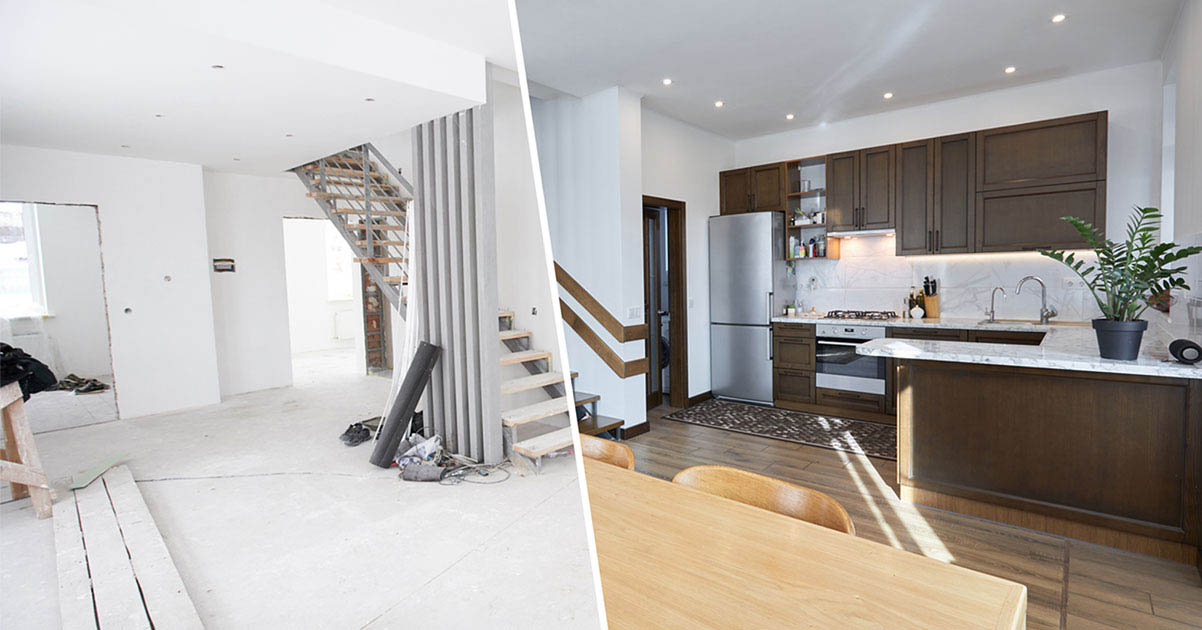
At Homevu™, we understand that well-crafted before-and-after photos not only showcase your expertise but also build trust and credibility. They are a window into your company’s capabilities that can inspire potential clients to envision their own dream spaces.
This guide will walk you through the entire process and provide tips so your photos don’t just look stunning but are also functional and accurate.
Step 1: Prepare Your Equipment
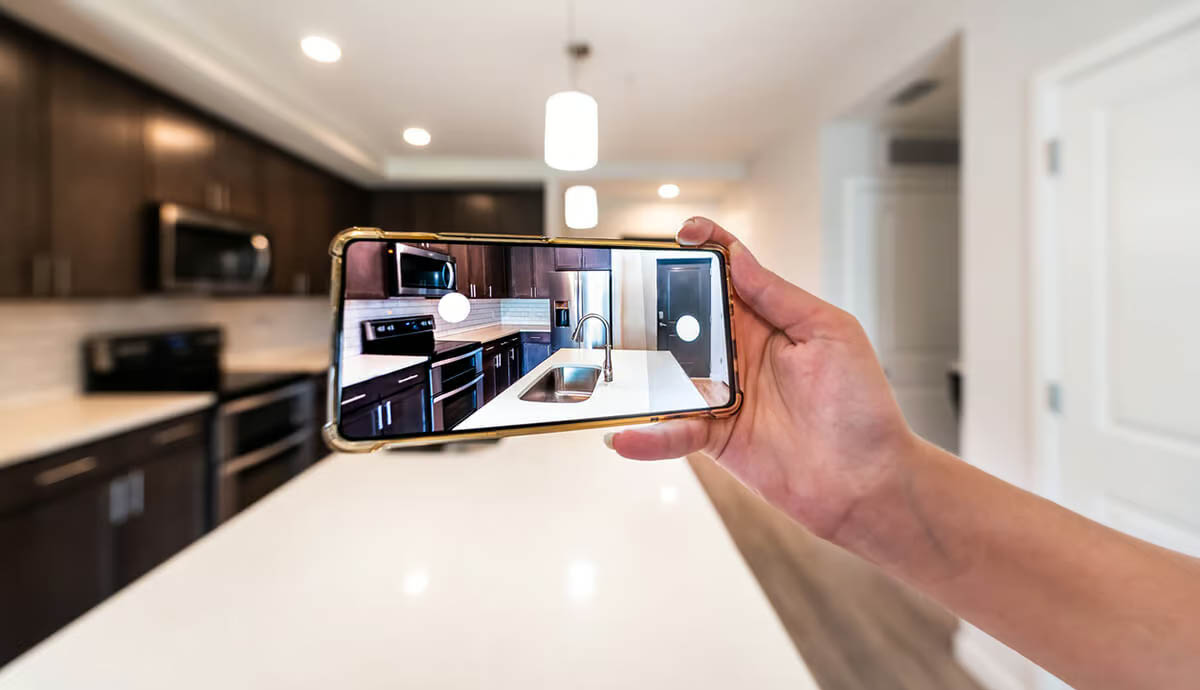
These days, smartphones are more than capable of capturing amazing photos with their high-megapixel cameras. But if you have resources and you want more control over your shots, a digital camera such as a DSLR is recommended, especially if your subject (the focus of your photo) is something you believe should be professionally photographed. With DSLR cameras, you can manually adjust colours, exposure, and other settings.

Important Note: When deciding what camera to use, keep in mind that camera phones are more user-friendly than digital cameras. This is mainly because DSLRs require some degree of technical know-how to achieve great shots.
Below are tips on preparing both camera types:
| Phone Camera Users | Digital Camera Users |
| Ensure your camera lens is clean. | Charge your camera batteries fully. |
| Check your storage space for ample photos. | Format your memory card. |
| Enable your phone’s camera grid (instructions below). | Familiarize yourself with your camera settings. |
Enabling the Camera Grid for Phones
The camera grid is a guide that looks like checkered lines which help you level or straighten your shots. Here’s how to turn it on:
- Apple Devices1:
- Open “Settings.”
- Go to “Camera.”
- Toggle “Grid” to on.
- Android Devices2:
- Open your camera app.
- Go to settings (usually a gear icon).
- Find “Gridlines” or “Grid” and enable it.
Step 2: Capture the “Before” (Pre-Renovation) Photos
An important step before pressing the shutter button is to clean and declutter the space/subject. While it may be tempting to capture it in its current messy state to enhance the contrast with the “after” shot, an untidy subject can distract viewers from the structure itself. Remember, the goal is to showcase the potential of the space, not its current clutter.

Now, it’s time for the photoshoot. Here’s a step-by-step guide to capturing pre-renovation photos:
- Shoot in Landscape (Horizontal): This format is ideal for websites, emails, and most digital platforms. It allows for better cropping and resizing without sacrificing the subject.
- Level Your Shots: Use the grid to ensure your photos are straight. It’s a subtle detail that significantly enhances professionalism.
- Perfect the Lighting: Use natural light, which also means turning all the lights off. Shoot during the day to utilize morning or afternoon sun.
- Don’t be afraid to control the natural lighting of the space with curtains or blinds.
- Avoid using flash, as it can create harsh shadows and distort colours.
- If there isn’t enough light coming through, use lamps and overhead lights to create a balanced, inviting atmosphere.4
- Incorporate White Space: White space (or negative space) is the room you leave around your subject so that your subject doesn’t fill the entire image.It gives your subject room to breathe and offers a place for the eye to rest, which makes your subject stand out more clearly.3 Just move back a few steps away from your subject to get more white space.
- Steady Your Shots for Crisp Images: If your hands tend to get a little shaky, use a tripod. It keeps your camera still, so you don’t have to worry about blurry shots.
- Lock in on Your Subject
- Smartphone Users: Simply tap the screen where you want to focus. Your phone’s autofocus will do the rest!
- Digital Camera Users: Gently press the shutter button halfway down until you hear a beep or see a focus indicator light up. This means your subject is sharp. If it doesn’t focus, adjust the focus ring until it does.
All that’s left to do is push the capture button. Make sure to have multiple takes on several angles so you have a lot to choose from later on. Don’t stop until you know you got your best shots.
Step 3: Capture the “After” (Renovated) Photos
With the renovation now complete, it’s the perfect moment to photograph the transformation. Previously, you’ve cleaned and decluttered the space. This time, it’s important to stage it. Add tasteful accessories, decorative elements, and furniture to highlight the full potential of the renovated space. After that, begin the photoshoot.
Here’s a comprehensive guide for taking effective post-renovation photos:
- Match the Angles of Your Pre-Renovation Shots: Take your “after” photos from the same angle, position, and, ideally, at the same time of day as the before photos. This will highlight the transformation in the most accurate and impactful way.
- Refine Your Lighting: While you should aim to replicate pre-renovation lighting, feel free to make adjustments to highlight the specific features that need more emphasis. For example, you can use additional lighting to showcase new countertops, accentuate unique architectural details, or bring attention to a newly installed backsplash.
- Refrain from Using Filters: It’s tempting to use filters to enhance the appearance of your “after” photos, but filters can distort their true colours and misrepresent your work. Keeping your photos filter-free ensures they accurately reflect the quality and authenticity of your craftsmanship.
- Do Detail Shots: Capture close-up shots of specific details of your renovation. These could be intricate tile work, new cabinetry, or unique design elements. You can post these along with the before-and-after photos to give your audience a closer look at your work.
Consider the general guidelines for taking “before” photos as well, such as stabilizing your shots with a tripod, incorporating white spaces, etc.
Step 4: Editing
Think of editing as a subtle touch-up, not a complete makeover. If you used a smartphone, your photos might only require minimal adjustments like cropping or straightening. The same applies to a digital camera.
However, some DSLRs that shoot in RAW format capture images that appear dull compared to the actual scene. Basic editing can revive their colours and details. A few tweaks to brightness, contrast, and white balance can work wonders, but avoid overly saturated colours.
If you’re confident with how the images look and wish not to fine-tune them, we recommend using your editing software only to create a side-by-side render of your before-and-after shots.
Pro Tips to Further Enhance Your Photos
Aside from the fundamental steps, there are a few tips that can elevate the quality of your photos and make the shooting process easier:

| Shooting Tips | Common Mistakes to Avoid |
| Capture outdoor photos during the golden hour (shortly after sunrise or before sunset) for soft, warm light and fewer shadows. On cloudy days, take advantage of the diffused light for even outdoor lighting.5 | Avoid shooting against the light (or the sun) as it will darken your subject. |
| Include human faces in your photos to make your service more relatable. | Check mirrors and windows for unwanted reflections (including your own). |
| Take the opportunity to record videos as well. These can be used as additional marketing materials. | Watch out for your own shadow or other distracting shadows in the frame. |
| Shoot from all angles and heights to find the most flattering perspective of your subject. | Avoid sending your photos via messaging apps, as they tend to degrade in quality. Instead, upload them to a drive or cloud. |
Keep in mind: Your photos are a testament to the transformative power of your home renovation company. Investing time and effort in capturing stunning before-and-after photos can greatly impact your portfolio and highlight your work’s transformation. These visuals can help you stand out in a competitive market and attract clients who value proven results.
We’ll Help You Maximize the Impact of Your Photos
Our digital marketing experts at Homevu™ will strategically utilize your photos across your website, social media, and targeted ads to create compelling narratives that attract leads and drive conversions. We’ll ensure your photos inspire the right audience, maximizing their impact and fueling your business growth.
Contact Homevu™ today and let us help you market your home renovation business through effective digital marketing strategies that fit your goals. Learn more here: https://www.homevu.com/home-seo-services/.
References
- “Use iPhone Camera Tools to Set up Your Shot.” Apple Support, support.apple.com/en-sg/guide/iphone/iph3dc593597/ios.
- “How Do I Enable the Grid Lines Setting on My Samsung Phone? | Samsung Australia.” Samsung Au, 8 May 2024, www.samsung.com/au/support/mobile-devices/enable-grid-on-camera.
- Goodden, Nico. “Negative Space in Photography — Nico Goodden – Urban Photographer – Digital Photography Learning.” Nico Goodden – Urban Photographer – Digital Photography Learning, 15 Feb. 2021, www.nicholasgooddenphotography.co.uk/london-blog/negative-space-in-photography.
- Schroeder, Lauren. “How to Shoot Real Estate Photography Using Natural Light.” Digital Photography School, 26 Nov. 2020, digital-photography-school.com/shoot-real-estate-photography-using-natural-light.
- Almonte, Vinia. “Mastering the Perfect Natural Light for Real Estate Photography – WindowStill.” WindowStill, 23 Aug. 2023, www.windowstill.com/mastering-the-perfect-natural-light-for-real-estate-photography/posts.
You May Also Like